3 minutes
Include OS release and package metadata in Docker images when using FROM scratch
In this post, you’ll learn how to create minimailstic Docker image using FROM scratch that doesn’t break vulnerability scanners.
FROM scratch is a reserved Docker image that signals to the build process that you want the next command in the Dockerfile to be the first filesystem layer in your image. Meaning the image won’t contain pre-installed libraries, packages, or a base operating system. It’s typically used when you want to build a Docker image that contains your a single binary and nothing else.
That sounds awesome right? Well, it is. Except when the image can’t be scanned for vulnerabilites. 😅 But, just for fun, let’s see what happens when you do this.
https://x.com/joshduffney/status/1709629776623771676?s=20
Build an image without package metadata
For this post, I’ve written a simple hello-world app in Go and written an accompaning Dockerfile to containerize the appliaction. As you can see from the image, the one on the bottom is significantly smaller. That’s because FROM scratch was used to remove the entire file system, exept the hello binary.

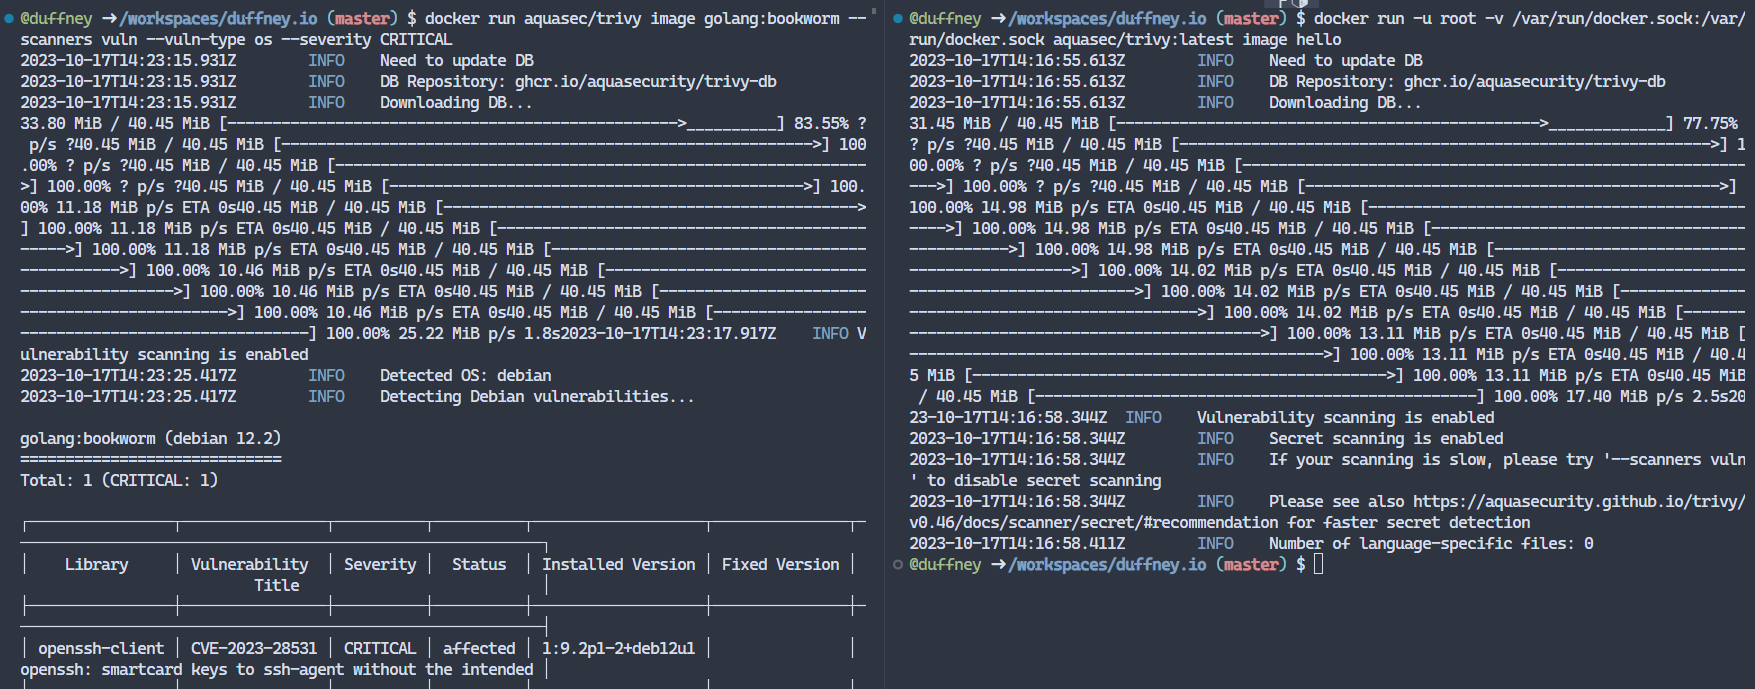
Having a smaller image is great, but check this out. If I run trivy on the base image and the hello image I get different results.

On the left is the scan results of the base image golang:bookworm. I’ve filter the results of the scan to only output critical OS vulnerabilites, which shows exactly 1 CVE matching that critera. On the right, are the scan results of the hello and as you can see, no vulnerablites were found.
Running the command again on the hello image with the --debug flag Trivy tell us why, no OS was detected!

COPY OS release & package metadata
Turns out, there’s a simple fix for this. Just add a few COPY commands to the Dockerfile to persist the OS release information and package metadata. But how do you know which files to copy into the image? I’m glad you asked.
Since Trivy is an open-source tool, you can go directly to the source code and find the file paths for both the OS release information and package metadata.
As you might expect each operating system and distrubtion tend to be differ, so for our base image that’s Debian based, the locations are:
- OS release
etc/debian_version
- dpkg metadata.
var/lib/dpkg/statusvar/lib/dpkg/infovar/lib/dpkg/available
NOTE: You can find other OS information here and more package metadata location’s here.
#Updated with OS & dpkg metadata
FROM golang:bookworm AS builder

WORKDIR $GOPATH/src/mypackage/myapp/
COPY . .

RUN go get -d -v
RUN go build -o /go/bin/hello

FROM scratch

COPY --from=builder /var/lib/dpkg/status /var/lib/dpkg/status
COPY --from=builder /var/lib/dpkg/available /var/lib/dpkg/available
COPY --from=builder /var/lib/dpkg/info /var/lib/dpkg/info
COPY --from=builder /etc/debian_version /etc/debian_version
COPY --from=builder /go/bin/hello /go/bin/hello

ENTRYPOINT ["/go/bin/hello"]
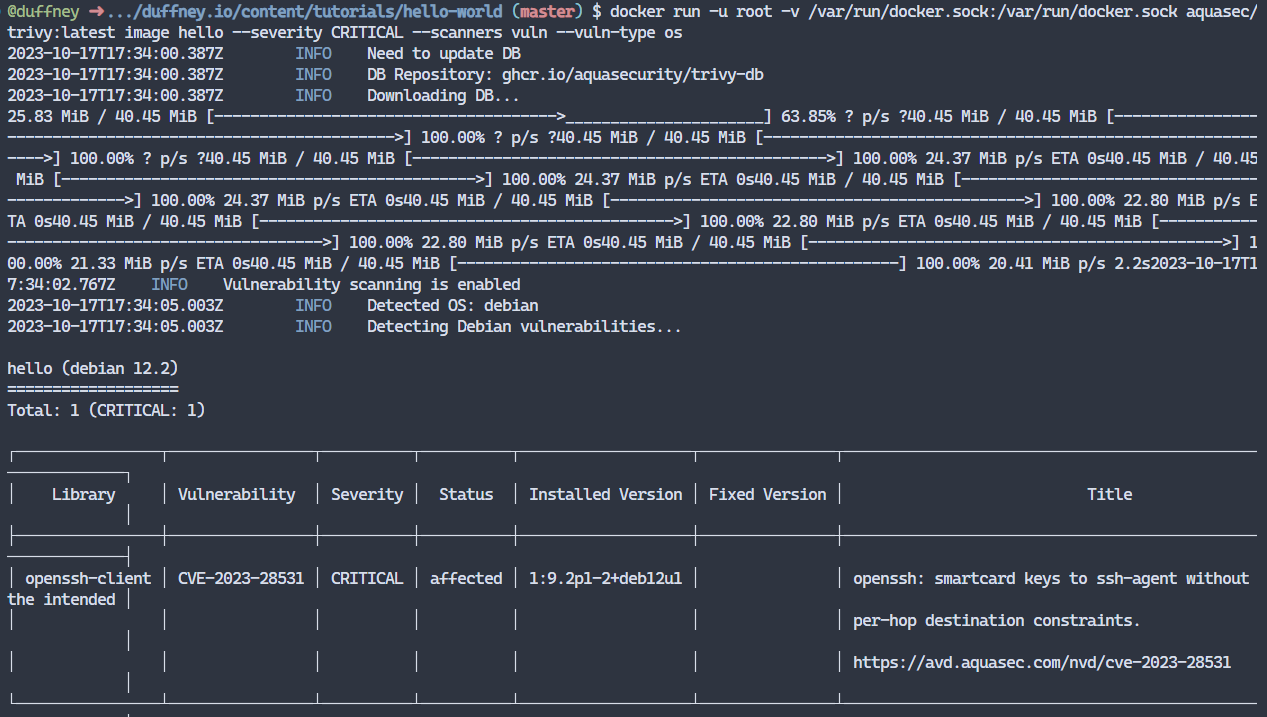
Running Trivy on the hello image again after rebuilding it shows that the scanner can now detect the vulnerabilites within the contatiner. Problem solved!

#Trivy cmd to run against local images
docker run -u root -v /var/run/docker.sock:/var/run/docker.sock aquasec/trivy:latest image hello --severity CRITICAL --scanners vuln --vuln-type os
Why the -u root and volume mount? Here’s the answer