10 minutes
Using ANSI Escape Sequences in PowerShell
When using ANSI within PowerShell there are two main parts; the escape character and the escape sequence. The escape character is used to indicate the beginning of a sequence and changes the meaning of the characters that follow the escape character. Most commonly escape characters are used to specify a virtual terminal sequence (ANSI escape sequence) that modifies the terminal. Escape characters are a standard of in-band signaling that control the cursor location, color, font styling, and other options within terminals and terminal emulators. ANSI escape sequences are often used with modifying command line prompt displays!
Windows PowerShell doesn’t have a built-in escape special character. Because of that you’d have to use "$([char]27)" to output an ASCII character representing an escape character. However, PowerShell now includes a special character for escape `e . To use the escape character, you start a string with the escape character `e followed by an opening square bracket `e[. Inside the square bracket is where you place the escape sequence. That escape sequence will determine how the terminal interpret the characters and acts accordingly.
The best way to understand ANSI escape sequences is to break it down into its different parts. Using some ASCII art as an example you can break down the sequence `"`e[5;36m$asciiArt`e[0m" into its different parts. The sequence starts with the control sequence introducer `e[. The `e is the escape character and [ is the introducer. What follows is the sequence. Each of the numbers within this sequence represent an argument. The number 5 represents an argument that makes the text within the sequence blink. Each argument must be separated by a semi colon, which is why you see a semi colon between 5 and 36. Values 30-37 represent different foreground colors. In this example 36 represents a foreground color of cyan.
Next in the sequence is the letter m which represents a function. The function is called SGR (“Select Graphics Rendition”) and accepts several arguments which were define earlier in the sequence. What follows after the function is the text that will be displayed. In this example that is a here-string stored in the variable $acsiiArt that contains the ASCII art for #PS7Now. At the very end of the sequence `e[0m is calling the SGR function again, but this time it is using the argument 0 to reset and turn off all the attributes defined in the first sequence. Putting the sequence back together again and running it within a terminal will result in the ASCII art #PSNow being displayed with a cyan font and flashing text. Now that you have a good understanding of ANSI escape sequences, let’s take a look at what else can be done with them and have some fun!
$asciiArt = @"
     __ __  ____ ___________   __
  __/ // /_/ __ \ ___/__  / | / /___ _      __
 /_  _  __/ /_/ \__ \  / /  |/ / __ \ | /| / /
/_  _  __/ ____/__/ / / / /|  / /_/ / |/ |/ /
 /_//_/ /_/   /____/ /_/_/ |_/\____/|__/|__/

"@

Write-Output "`e[5;36m$asciiArt`e[0m";
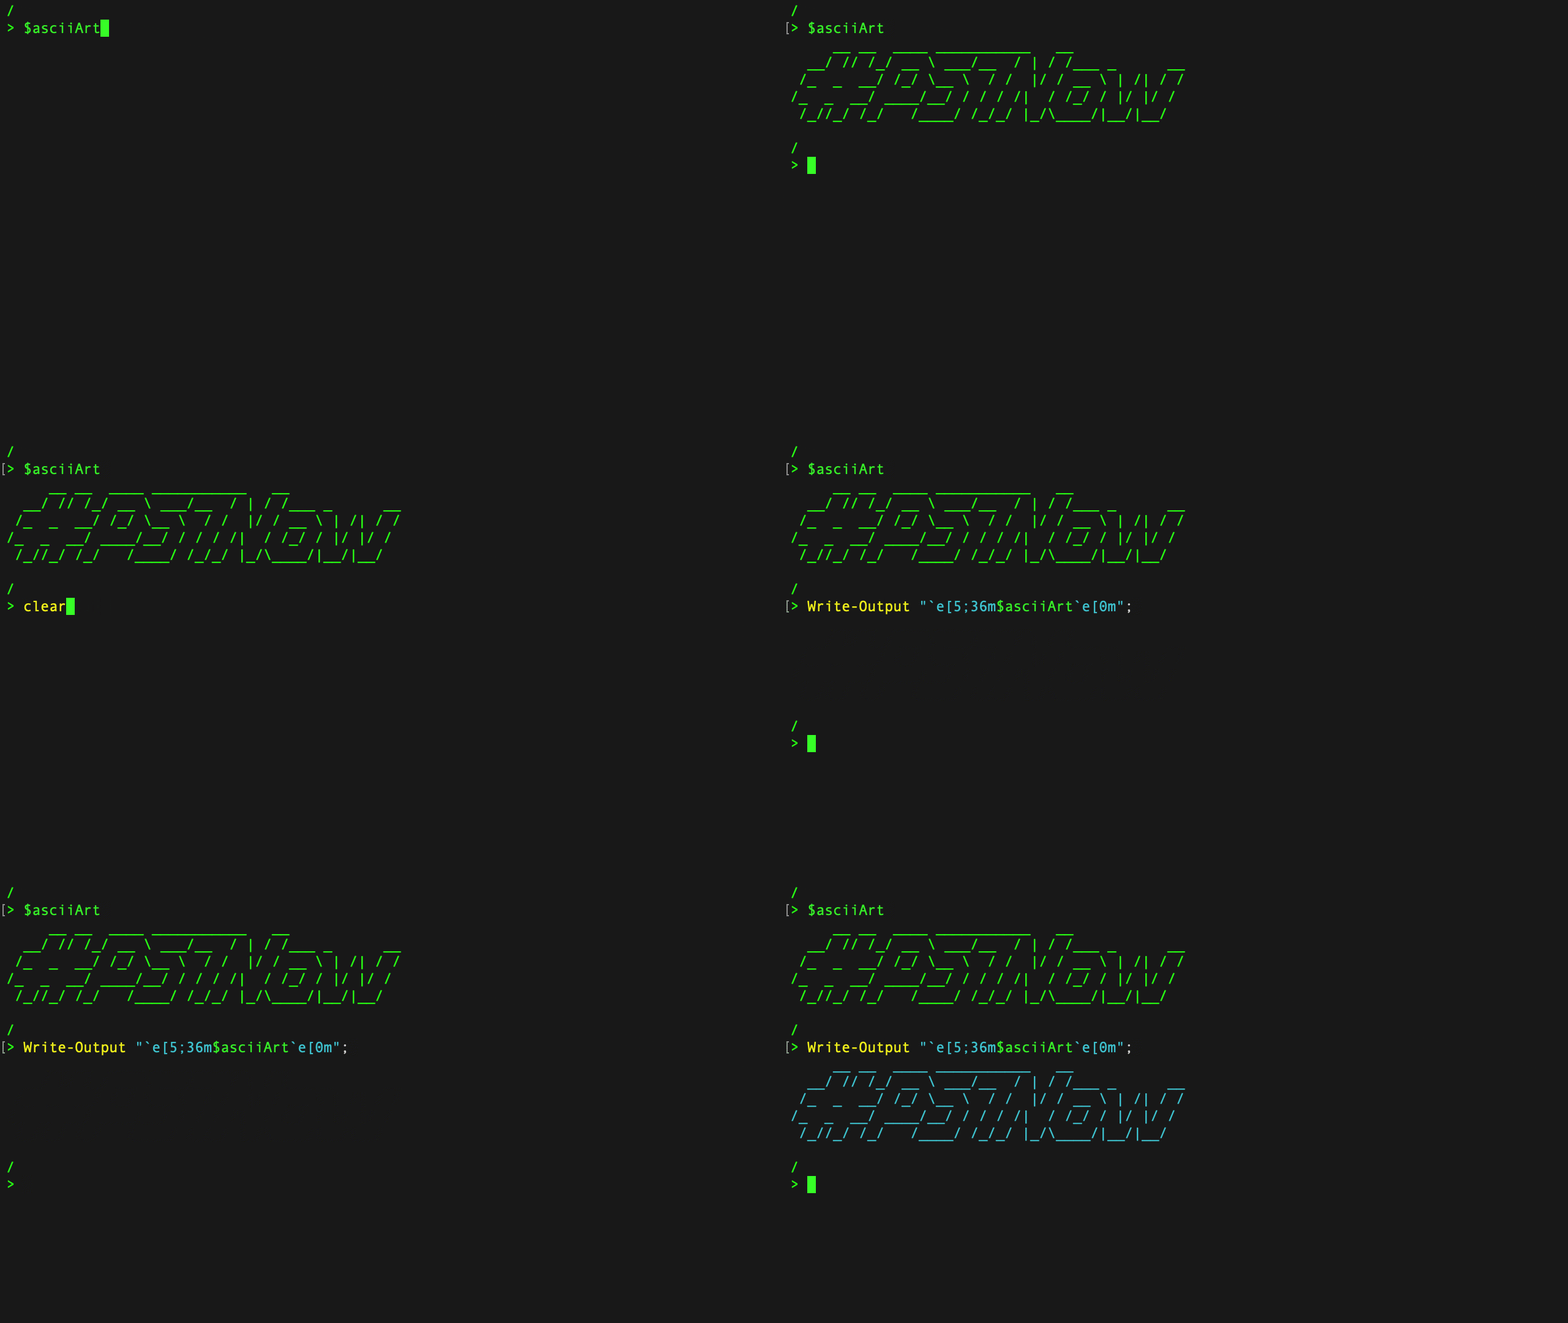
Blinking is determined by your terminal, yours might not support it.
Text Styling
ANSI escape sequences support a few different text styling options; bold, underline, and invert. Text styling with ANSI escape sequences are one of the more basic modifications you can make to the terminal’s text. Each of the styles has a reset argument that will turn off the attribute it enabled. This is important to know, because if you do not reset the attribute all future inputs will have that style applied.
| Style | Sequence | Reset Sequence |
|---|---|---|
| Bold | `e[1m | `e[22m |
| Underlined | `e[4m | `e[24m |
| Inverted | `e[7m | `e[27m |
| Reset all | `e[0m |
Bold
$text = '#PS7Now';
Write-Output "`e[1m$text";

Underline
$text = '#PS7Now';
Write-Output "`e[4m$text";

Invert
$text = '#PS7Now';
Write-Output "`e[7m$text";

Resets
All of the previous examples do not include a reset sequence. If you do not include a reset sequence the ANSI attributes you applied will continue to apply to all future text your code outputs to the screen. In PowerShell the command or script scope limit its impact, but it does affect the output of your code. Running the below code snippet, you’ll notice that the text following #PS7Now is still bold and inverted. It will also change the first new line return of your terminal prompt.
$text = '#PS7Now'
Write-Output "`e[1;7m$text, ANSI not reset, text is still bold and inverted"

When using ANSI reset sequences you have two options. You can either reset the attribute individually or reset all of them. Using the table above you know that the bold argument is 1 and the invert argument is 7. Combining them you can create the escape sequence `e[1;7m. This sequence will style the text bold and invert the foreground and background colors. To reset just the invert you would use the sequence `e[27m. The text after that sequence would remain bold, but not inverted. To reset just the bold attribute you would use another sequence `e[22m. That would remove all the attributes applied by the first sequence and the text would no longer be inverted or bold. Another option available if you do not need to keep any of the attributes enable is to reset all of them at once. The sequence to reset all attributes is `e[0m.
$text = '#PS7Now'
#reset styles individually
Write-Output "`e[1;7m$text `e[27m Not Inverted `e[22mNot Bold or Inverted";

#reset all
Write-Output "`e[1;7m$text`e[0m Not Bold or Inverted";

Moving the Cursor
ANSI sequences can do more than just modify the style of text. ANSI also supports cursor movement. While I’m not sure of the practical usage of this in a PowerShell script, it is fun to play around with. Using `e[1m$pwd`e[2A;sleep 5 as an example sequence you can see the cursor position change. As you learned previously the first sequence `e[1m$pwd is bolding the font and then outputting the variable $pwd. The second sequence `e[2A is what is moving the cursor position. The number 2 is defining how many positions to move the cursor and A is an ANSI function for cursor up. Normally this would happen so fast you wouldn’t be able to see it. To take care of that the sleep 5 is pausing the output for 5 seconds so you can see the cursor move.
Learn more about ANSI cursor positioning here.
"`e[1m$pwd`e[2A";sleep 5
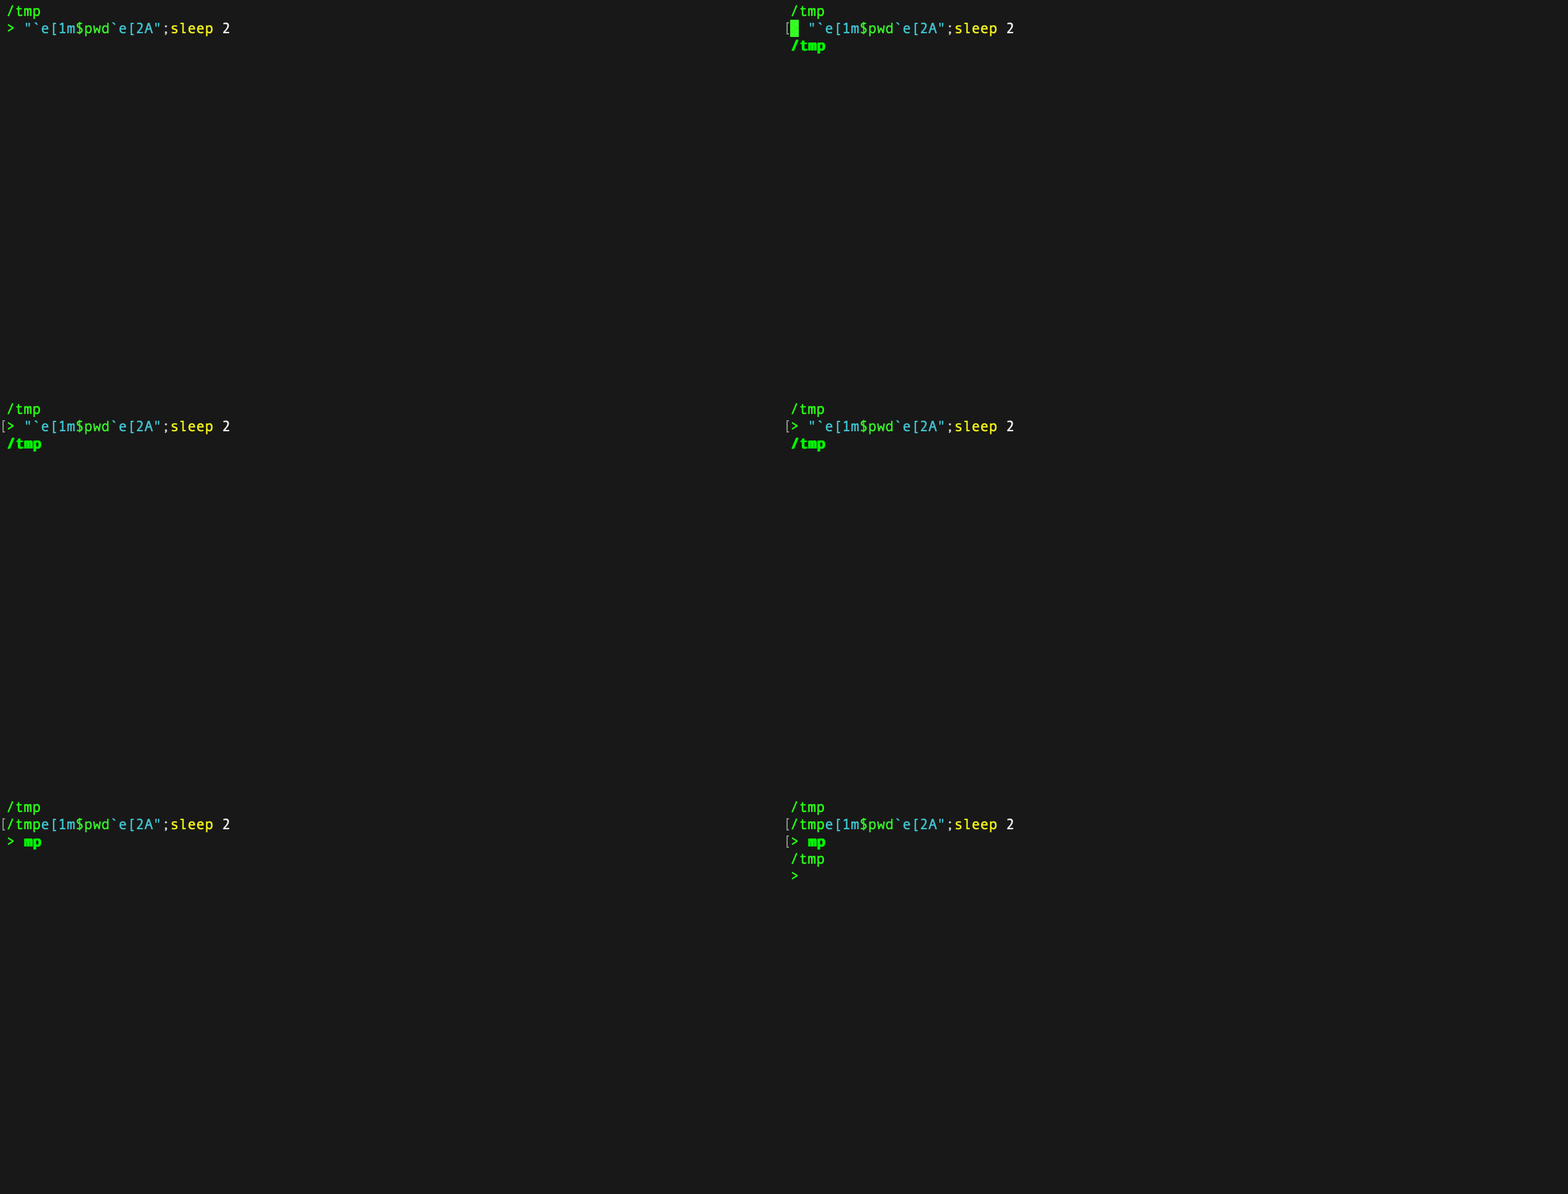
Viewport Positioning “Scrolling”
Using the S ANSI sequence you can also use scrolling to add padding to the text that is output. The sequence `e[3S$text`e[S3 will fill new lines in from the bottom of the screen. The value 3 is the number of lines that will be filled in. There is a scroll down sequence as well. You can read more about viewport positioning here.
#Scroll Up (add 3 lines of space top & bottom)
$text = '#PS7Now'
Write-Output "`e[3S$text`e[3S"
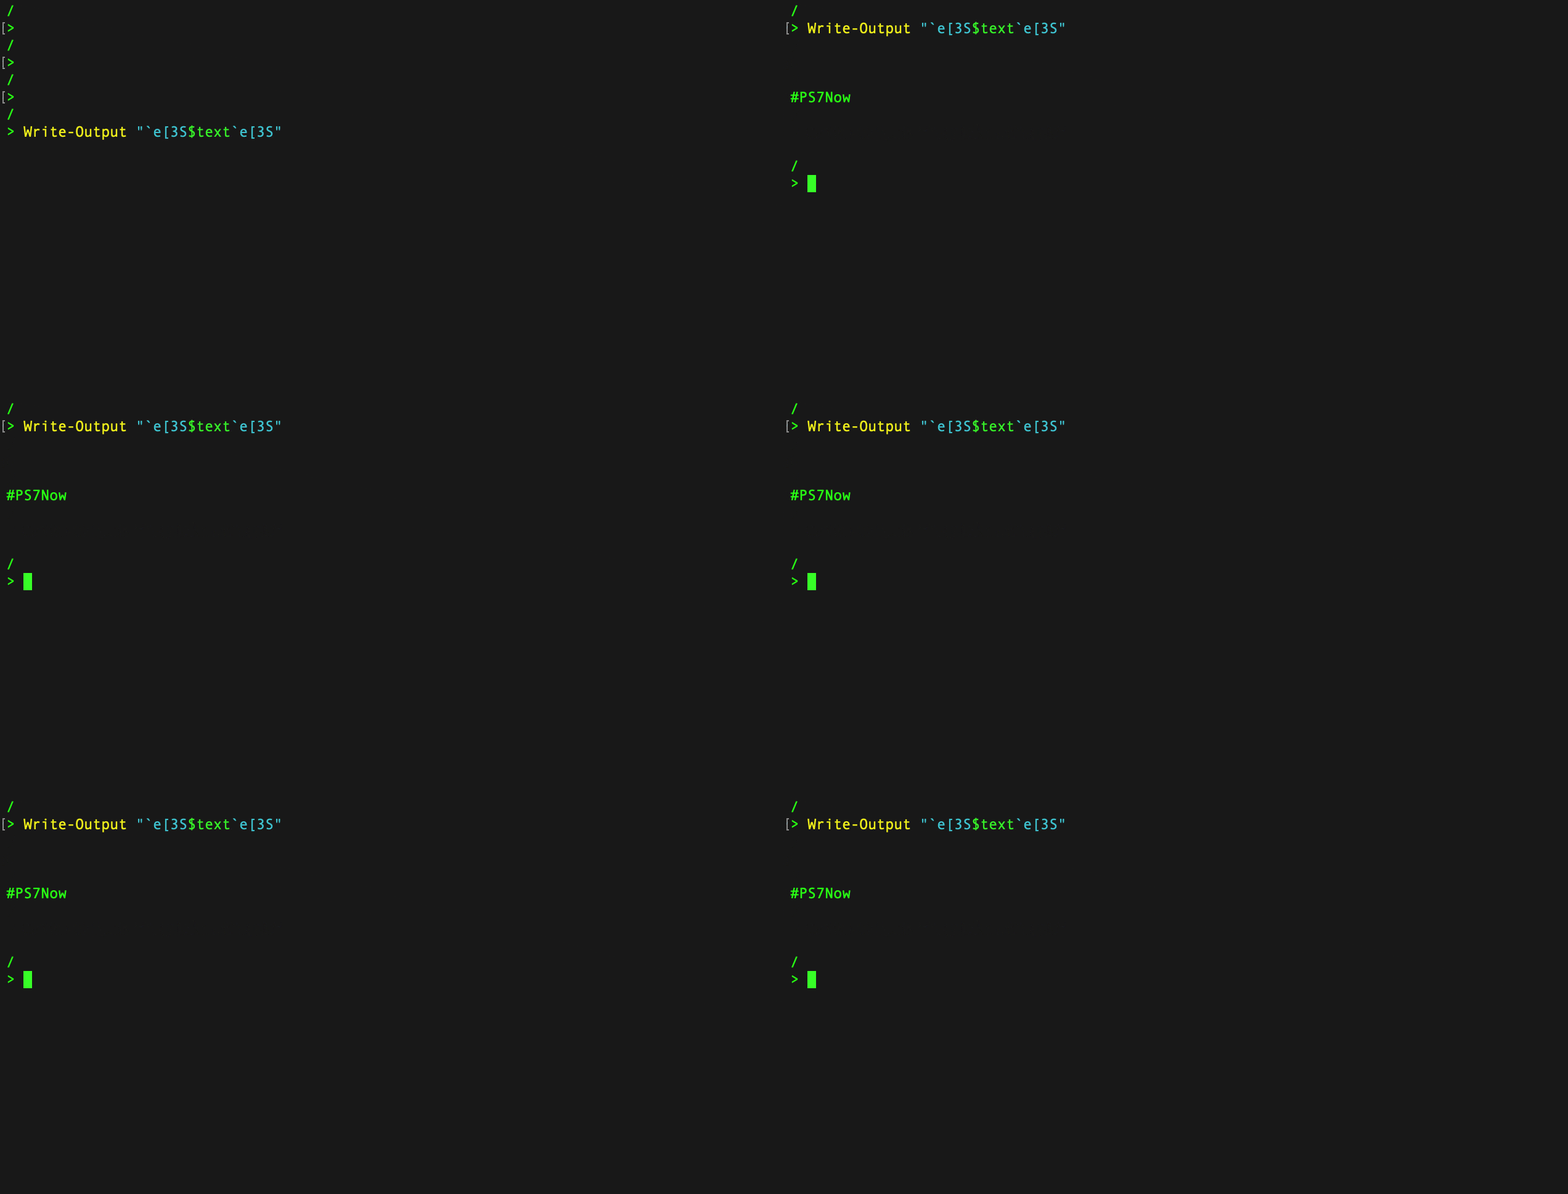
Cursor Positioning & Text Modification
ANSI escape sequences can also modify the cursor position. While the possibilities are endless, one way it can be used is to save and restore cursor location. To save the current cursor position you’ll use the sequence s after the control sequence introducer. This will not modify the output of the string in anyway, it simply saves the position for restoring later. After the variable $text outputs #PS7Now you’ll use the restore sequence which is u. This will place the cursor at the # character. With the cursor at that location you can use a text modification to delete the # at the beginning. The ANSI sequence for deleting a character is P. The 1 before the P is the number of characters that will be deleted. Running the below line of code will result in the # character being deleted. Simple, silly, but yet fun!
$text = '#PS7Now'
Write-Output "`e[s$text`e[u`e[1P"
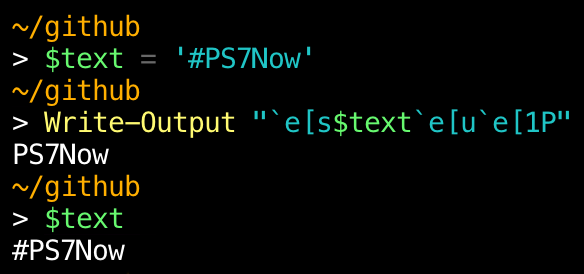
A few other text modification sequences worth mentioning are the erase in display and erase in line. While I struggle to find practical use for the at the moment. I can see them being useful as part of an April fools' joke. Say you have a co-worker who is somewhat obsessed with their prompt display. You could add `e[s`e[u`e[K to the prompt function. The s and u save and restore cursor position as you’ve already learned. K in the erase in line sequence that will replace all text on the line with space characters. Which will effectively destroy their prompt function.
Erase Line
$text = '#PS7Now'
Write-Output "`e[s`e[36m$test`e[u`e[K`e[0m"
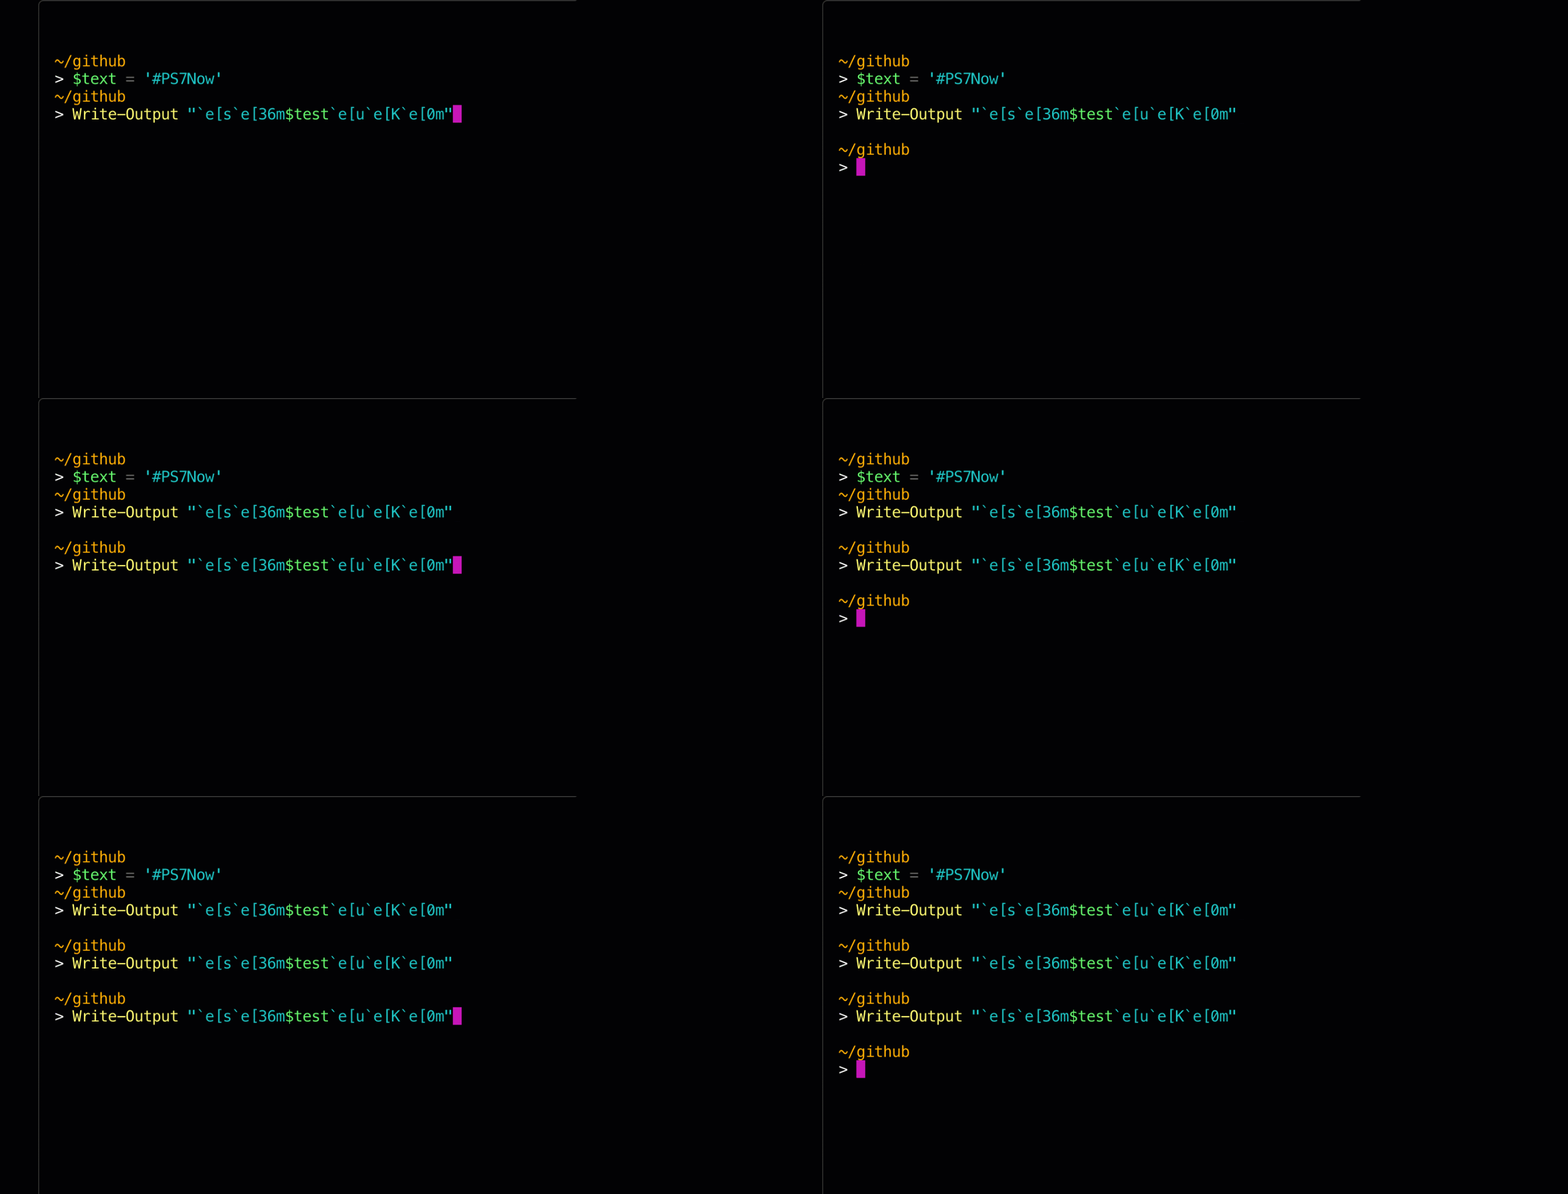
Another fun sequence might be to erase the entire display. The sequence for that is <n>J, where <n> is the number of space characters that will replace the display.
Erase Display
$text = '#PS7Now'
Write-Output "`e[2J`e[36m$text`e[0m"
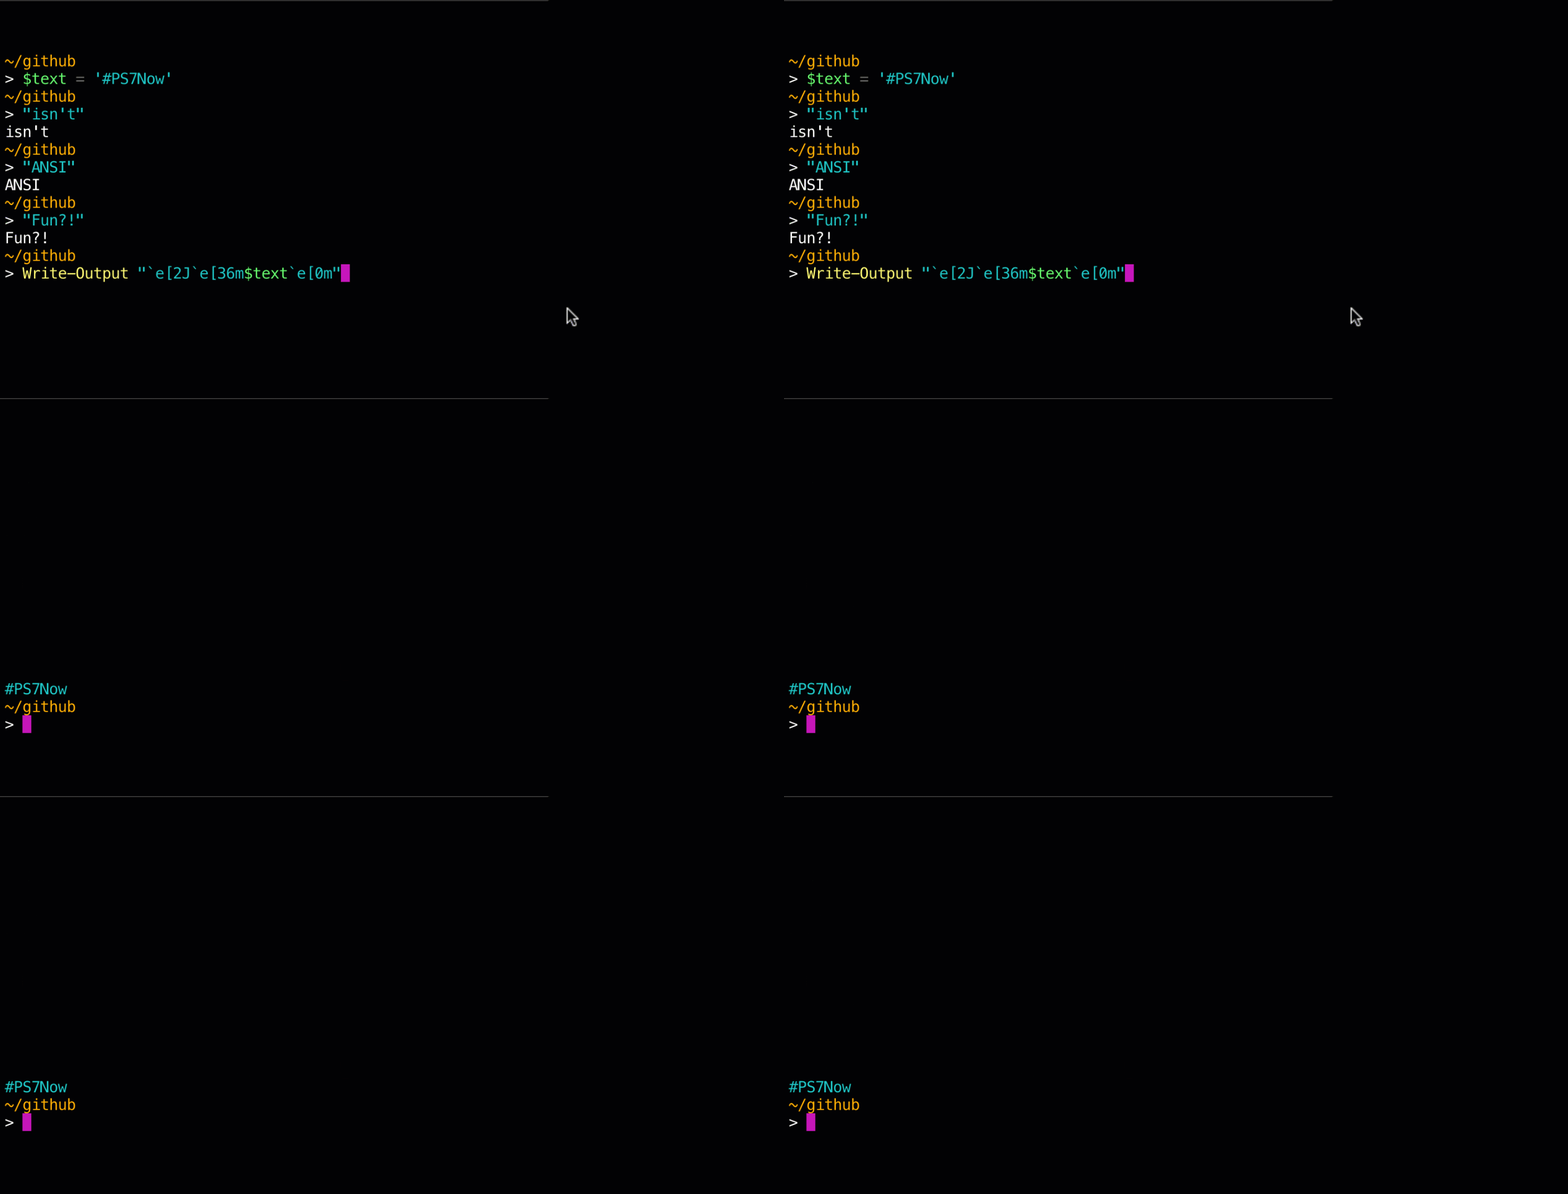
Read more about Text Modification and Cursor Positioning.
read more ANSI Escape sequence.
Basic Foreground & Background Colors
The original specifications of ANSI only had 8 colors that could be used to set the foreground and background colors. The SGR (“Select Graphics Rendition”) parameters 30-37 selected the foreground color, while 40-47 selected the background. You can use these color sequences with the m SGR function to modify the foreground and background colors of the text. Remember to reset your sequences.
| Color | Foreground Code | Background Code |
|---|---|---|
| Black | 30 | 40 |
| Red | 31 | 41 |
| Green | 32 | 42 |
| Yellow | 33 | 43 |
| Blue | 34 | 44 |
| Magenta | 35 | 45 |
| Cyan | 36 | 46 |
| White | 37 | 47 |
$fgColors = '30','31','32','33','34','35','36','37'
$bgColors = '40','41','42','43','44','45','46','47'

foreach ($fgColor in $fgColors)
{
    $bgColor = $bgColors | Get-Random
    Write-Output "`e[$($fgColor)m#PS7`e[0m`e[30;$($bgColor)m Now `e[0m`e[7;$($fgColor);$($bgColor)m >_ `e[0m"
}
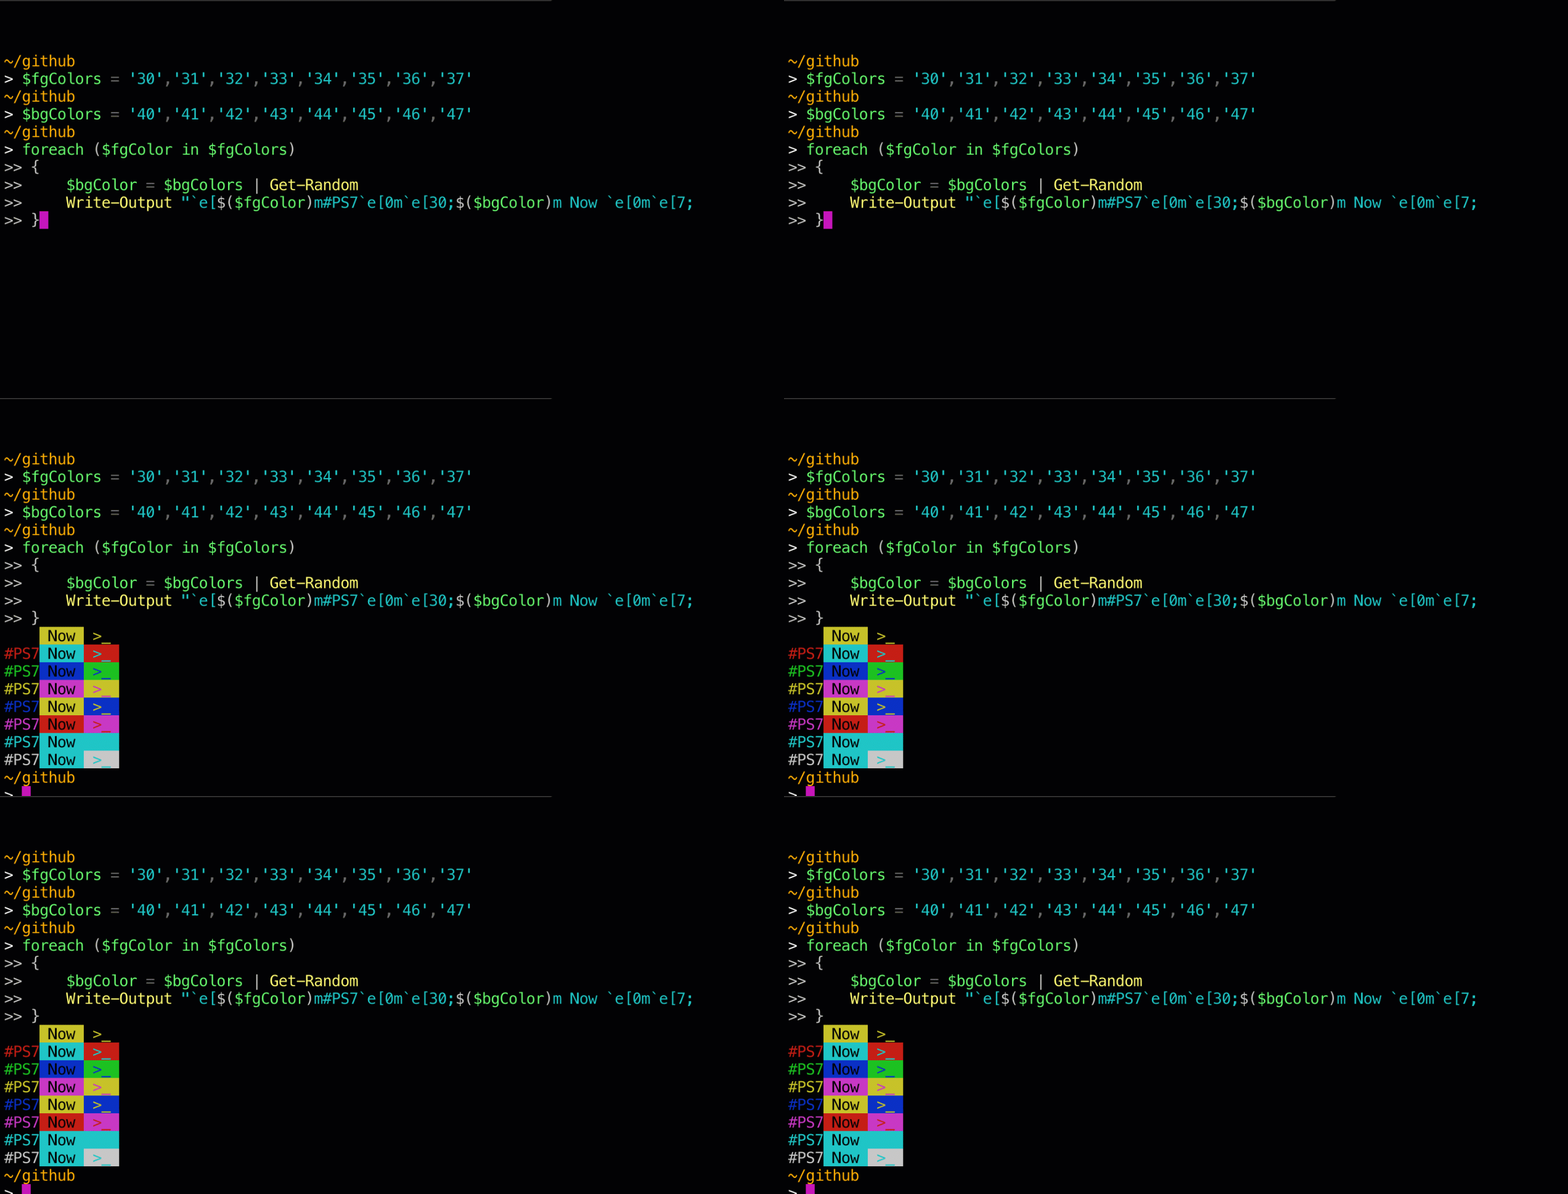
8-bit 256-Color Foreground & Background
If 8 colors isn’t enough, which it might not be. You can also use the 8-bit sequence which provides you with a range of 265 colors. The ANSI sequence for using 8-bit color is `e[<Foreground or Background Code>;5;(n) the (n) represent the 8 bit color code. Foreground is indicated by 38 and background is 48. An example sequence might look like this, `e[38;5;220m#PSNow. This sequence changes the foreground color to a dark yellow. The 256-color range has different sections; 0-7 are standard colors, 8-15 are high intensity colors, 16-231 are a 6x6x6 color cube, and 232-255 are grayscale colors.
ESC[ 38;5;⟨n⟩ m Select foreground color
ESC[ 48;5;⟨n⟩ m Select background color
0-7: standard colors
8-15: high intensity colors
16-231: 6 × 6 × 6 cube (216 colors)
232-255: grayscale
Read more about ANSI escape code colors.
You probably haven’t memorized the color codes for all the 256 colors that are available. That’s okay, you can output them in the terminal for reference. The following script block will output all the colors for both the foreground and background colors along with their code.
# 256-Color Foreground & Background Charts
$esc=$([char]27)
echo "`n$esc[1;4m256-Color Foreground & Background Charts$esc[0m"
foreach ($fgbg in 38,48) {  # foreground/background switch
  foreach ($color in 0..255) {  # color range
    #Display the colors
    $field = "$color".PadLeft(4)  # pad the chart boxes with spaces
    Write-Host -NoNewLine "$esc[$fgbg;5;${color}m$field $esc[0m"
    #Display 6 colors per line
    if ( (($color+1)%6) -eq 4 ) { echo "`r" }
  }
  echo `n
}
Putting the sequence to use, you can create some very interesting text. Below are some examples outputting #PS7Now and some ANSI art for the PowerShell icon.
"`e[38;5;27m#PS7`e[1mNow `e[22;38;5;15;48;5;27m >_ `e[0m"

"`e[38;5;248m#PS7`e[1mNow `e[22;38;5;15;48;5;237m >_ `e[0m"

Prompt Modification with ANSI
Now you are armed with enough knowledge to dive into the world of hardcore prompt customizations! Instead of covering that within the confines of this post, I will instead refer you to several other sources for inspiration.
Basic To Boss: Customizing Your PowerShell Prompt by Thomas Rayner
Prompt Example from Thomas Rayner
Anatomy of a Prompt (PowerShell) by Brad Wilson
Customize Your PowerShell Prompt with Nerd Fonts & ANSI Escape Sequences by Trevor Sullivan
Sources
Before writing this blog post I knew nothing of ANSI escape sequences, let alone the ANSI escape character. I must give credit where it is due and list all the sources I used to gain an understanding of ANSI escape sequences.
The (Mostly) Dependency Free PowerShell Prompt - Part 1
Bash tips: Colors and formatting (ANSI/VT100 Control sequences)
Console Virtual Terminal Sequences
How To Use ANSI/VT100 Formatting in PowerShell
Build your own Command Line with ANSI escape codes
PowerShell 7 Blog Week Authors
| Author | Blog | |
|---|---|---|
| Josh King | @WindosNZ | https://toastit.dev/ |
| Josh Duffney | @joshduffney | http://duffney.io/ |
| Adam Bertram | @adbertram | https://adamtheautomator.com/ |
| Mike Kanakos | @MikeKanakos | https://www.networkadm.in/ |
| Jonathan Medd | @jonathanmedd | https://www.jonathanmedd.net/ |
| Thomas Lee | @doctordns | https://tfl09.blogspot.com/ |
| Prateek Singh | @singhprateik | https://ridicurious.com/ |
| Dave Carroll | @thedavecarroll | https://powershell.anovelidea.org/ |
| Dan Franciscus | @dan_franciscus | https://winsysblog.com/ |
| Jeff Hicks | @jeffhicks | https://jdhitsolutions.com/ |
| Tommy Maynard | @thetommymaynard | https://tommymaynard.com/ |